In This Article
This post may contain affiliate links. If you make a purchase through links on our site, we may earn a commission. And if you do that, you are AWESOME!!! Thanks :)
Let’s learn how to make a candle mat for your next punch needle project! Whether you’ve been punch needling for a little while now or you’re just getting your punchy bearings, learning how to make a candle mat using your punch needle is easy-peasy and aesthetically pleasey! It’s wonderful how entry-level and awesome Punch Needling is for everyone. There’s punch needle project for each and every crafter; the creative possibilities are endless!
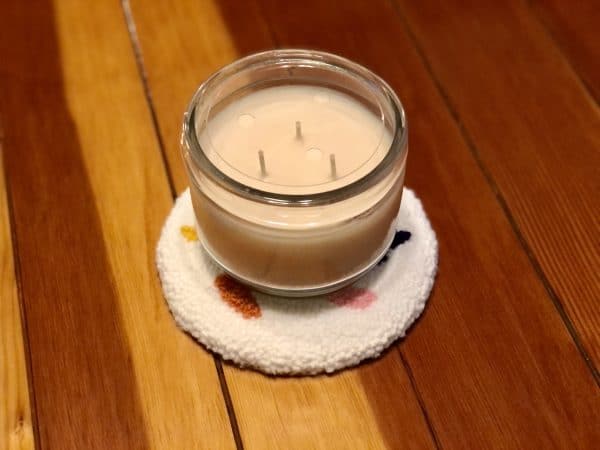
Do you have an arsenal of candles at home that rotate their special spot on your coffee table? Jazz it up with a gorgeously hand crafted piece by learning how to make a candle mat! The object of the candle mat is just like how it sounds; it rests underneath your candle, assisting in bringing out that perfect cozy atmosphere we all light a candle for.
Are you looking for a universally loved and customizable gift? Purchasing a candle that’s the right scent for the gift receiver and then punching a candle mat to go along with it is the perfect cozy gift. You can also get it done in a jiff when you follow our how to make a candle mat DIY steps!
Let’s get those punch needles threaded and our hoops taut, we’ve got an adorable punch needle project to tackle!
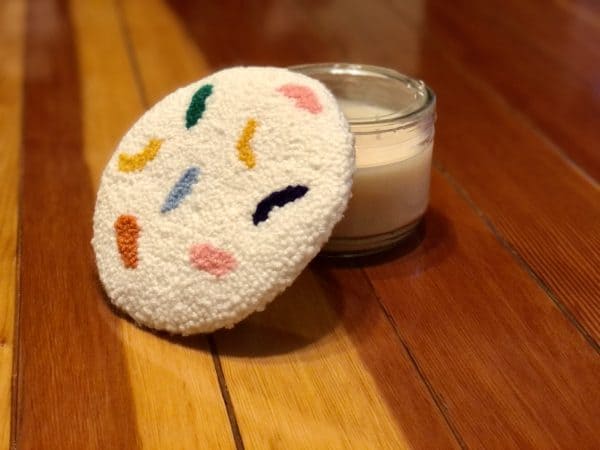
Candle Mat Pattern Ideas
One of the first steps of how to make a candle mat will be to draw or transfer your candle mat pattern onto your assembled embroidery hoop. So, let’s talk candle mat patterns!
Truthfully, you can go in any creative direction you want to with a candle mat pattern, or with any punch needle pattern, really. There’s just a few things to keep in mind:
- The length/size of your needle with determine how big/small your loops (the fuzzy side) will be
- Choosing a design that doesn’t contain too small of detail may work better so your loops don’t get tangled together
- Determine if you’ll be doing your project with the looped side being the finished side (in this case it will be!) or the flat stitch side will be your finished side
With those things in mind, let’s get into our creative candle mat pattern brainstorming session!
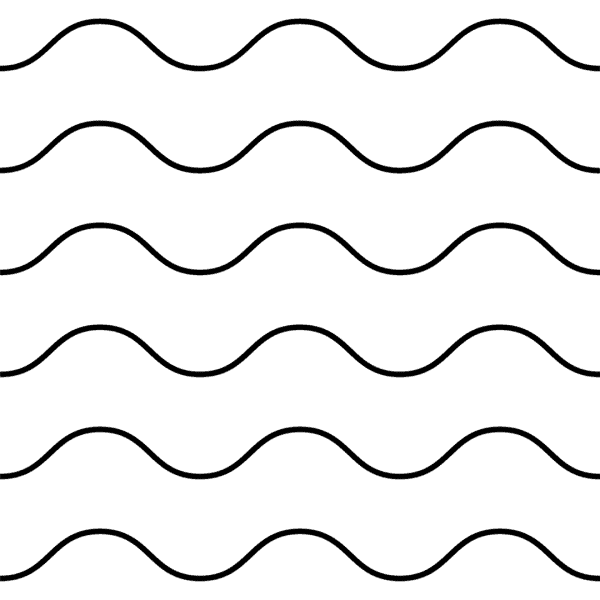
You can go with some simple line pattern ideas like the ones below, which you can trace or freehand onto your monks cloth…


Or, you can go with a recognizable shape that’s simple enough to complete with your punch needle…


We highly recommend checking out Canva to find some lovely candle mat pattern for your punch needle project. Their free version contains thousands of graphics that will have your creativity buzzing for more Punch Needle Projects just like this one of how to make a candle mat. Enjoy!
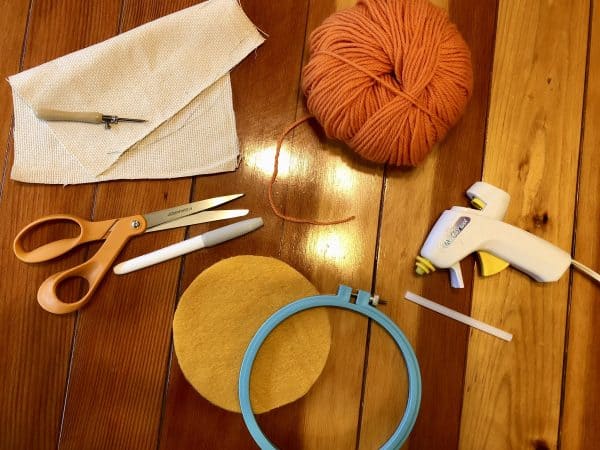
Punch Needle Project Supplies for How To Make a Candle Mat
If you’ve done punch needle projects before, you’ll probably be set for most of the supplies that’s required for how to make a candle mat! And if not, here is a handy-dandy list of the supplies you’ll need while learning how to make a candle mat. You got this!
- Punch Needle
- Wire Threader
- Embroidery Hoop
- Monks Cloth
- Painter’s Tape (Optional)
- Fabric Marker/Sharpie
- Acrylic Yarn (Colors of Choice)
- Hot Glue Gun w/ Hot Glue
- Felt/Fleece Backing
- Fabric Scissors
Now that you’ve got your list of supplies for your punch needle project ready to go, let’s get into the steps on how to make a candle mat already!
Steps for How To Make a Candle Mat
Alright crafty folks, you’ve got your candle mat pattern ideas, the punch needle project supplies is ready to go, now all that’s left is to walk through these simple and easy steps for how to make a candle mat. Piece of cake!
Step One: Ready Hoop & Trace/Draw Design on Monks Cloth
The first step in this easy-to-follow how to make a candle mat DIY is to cut out an appropriate amount of monks cloth for your project.
This will depend on what size you’d like your candle mat to be, for this punch needle project I used a roughly 6×6 embroidery hoop.
When cutting your monks cloth, you’ll want to make sure you’re leaving a few inches of space of monks cloth larger than your actual hoop size!
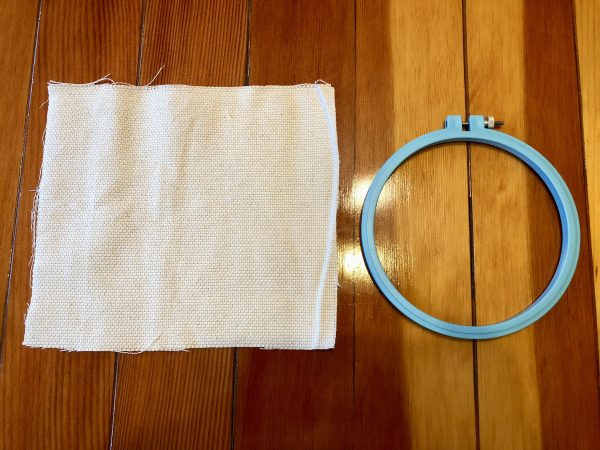
Pro Tip: Use painters tape to tape the edges of your cut out monks cloth to prevent frying during your punch needle project!
Frying isn’t the end of the world, but it’s also a tad bit annoying during your project if you keep getting monks cloth strands all over. Taking the minute or so to do this before you get started makes this delightful punch needle project even more of a breeze.
Get some more awesome Punch Needle Tips here!
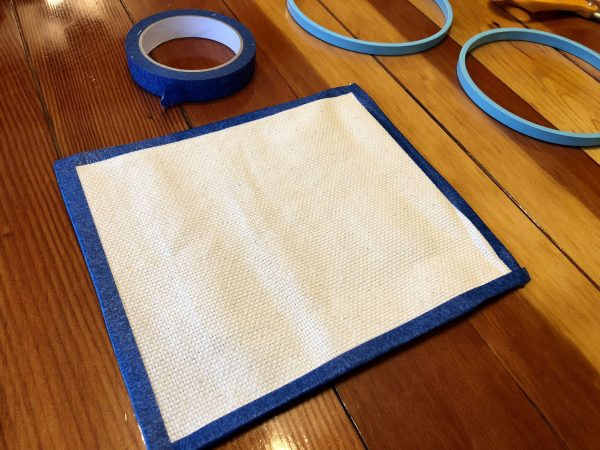
Once your monks cloth is ready, you can take your embroidery hoop a part and set the inside piece centered underneath your monks cloth.
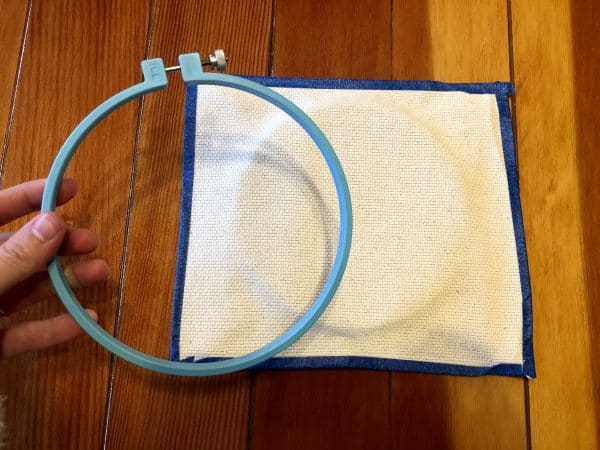
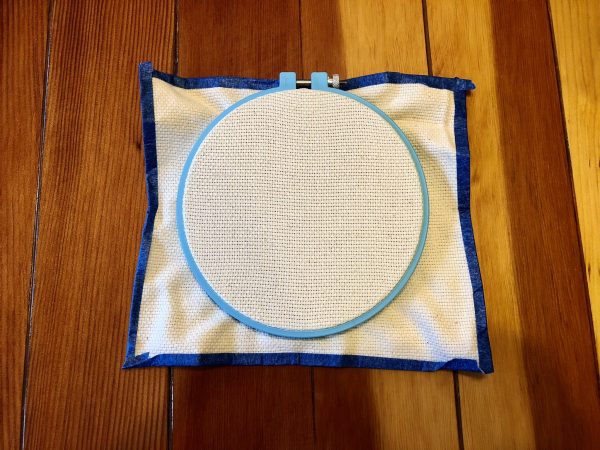
After the inside hoop is centered underneath the monks cloth, place the outer part of the hoop over it on top of the monks cloth.
A vital part of your punch needle project will be having your monks cloth taut. This ensures that your punched loops will stay and not unravel, and you’ll have a smoother time with your stitches if your monks cloth is nice and tight against your embroidery hoop. Many crafters compare it to the tightness of a drum!
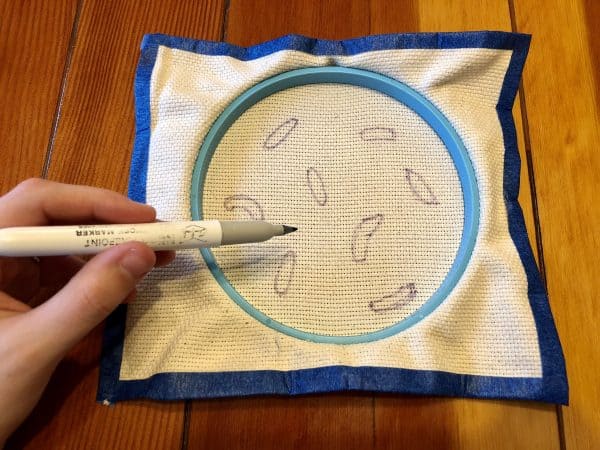
Now it’s Punch Needle Pattern time! I decided to go with a simplistic, carefree, and colorful design for my candle mat.
I would suggest making sure that your details aren’t too close together (unless your loops are going to be on the smaller side, or you’re very experienced) so that your loops don’t accidentally get muddled into one another.
IMPORTANT NOTE: For this project, I want my finished side to be the looped fuzzy side. So that means the pattern we’re drawing on has to go on the back side of the hoop, like in the photo below. This also means that the image will come out in the reverse on the other side unless you flip your design before tracing/drawing it on. Good things to keep in mind; I’ve punched in some backwards looking images before I finally remembered!
Step Two: Thread Needle & Punch Smaller Details First
Need assistance with learning how to thread a punch needle? We’ve got you covered right here!
All the excitement has been leading up to this, the punchy fun of bringing your punch needle project to life and getting the hang of how to make a candle mat!
Get all your yarn colors out, and begin with the smallest details in your project first. It’s more difficult to get in the smaller details after the fact, especially with loops of yarn all over your embroidery hoop. So, it’s good to get those cutesy wee details done first!
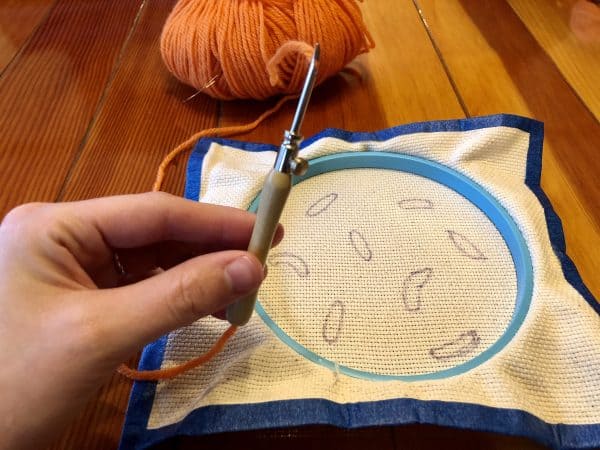
After you’re punched in your shape and it’s time to move onto the next detail in your punch needle project, you can turn your hoop over, and snip the yarn close to your project, leaving a bit of yarn left to pull down and out.
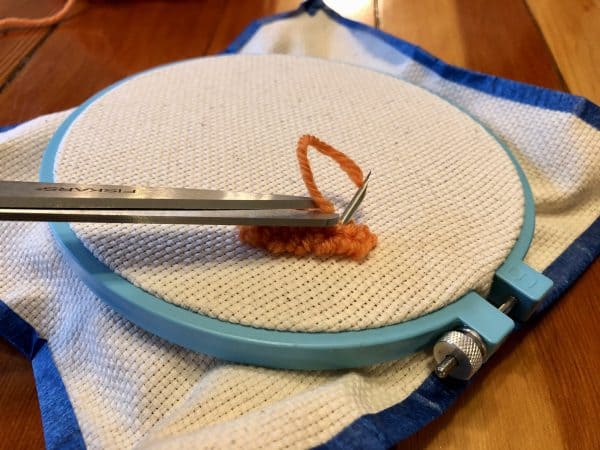
These little yarn tails that are on the drawn side of your project can either be cut at the end of your punch needle project or during the process.
If you potentially want to redo a section, I would suggest leaving the tail there so that you can easily pull up the yarn if you choose to redo it.
Otherwise, you can save those yarn tails in a baggie and repurpose them as stuffing for future projects!
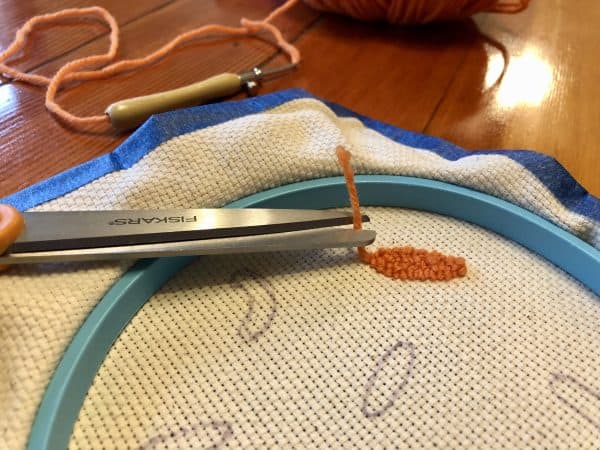
After you’ve finished one detail you can keep moving and punching them out, all the way up until you get to the bigger details in your design!
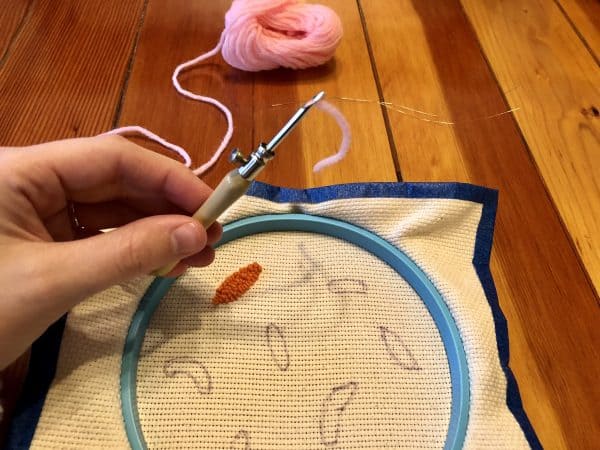
Tada! Look at all those fun colors, all grooving out together in one hip punch needle project. Let’s move on to the big stuff!
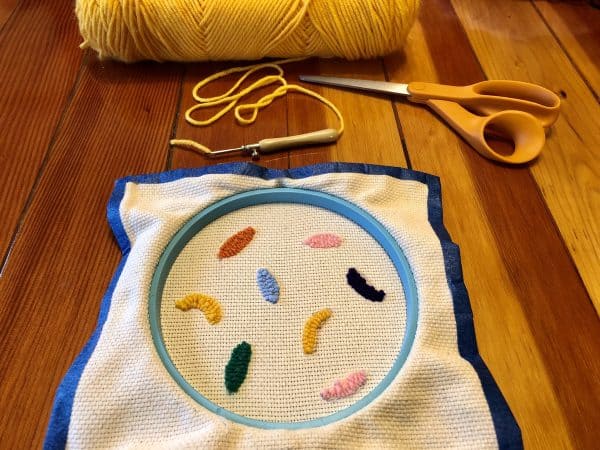
Step Three: Continue Punching from Smallest to Largest Details
Now that are smaller details are punched in and looking good, we can move onto filling in the bigger details.
In this case, it’s the background, which I’ve chosen white to make those fun squiggles of color pop!
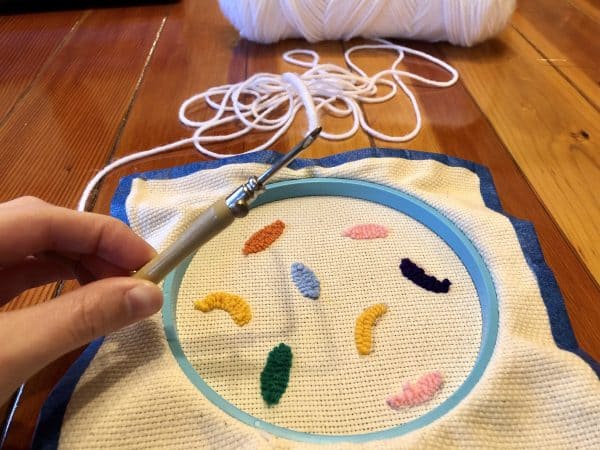
My biggest suggestion that helps me during my punch needle projects is to first carefully punch an outline around the smaller details.
This way, when you’re punching in the majority of your punch needle project, you don’t have to worry about running into your precious details. It almost serves as a bumper, but yarn can be finicky sometimes, so it’s still good to punch with care (wouldn’t that be a silly sentence anywhere outside of a Punch Needle DIY?!)
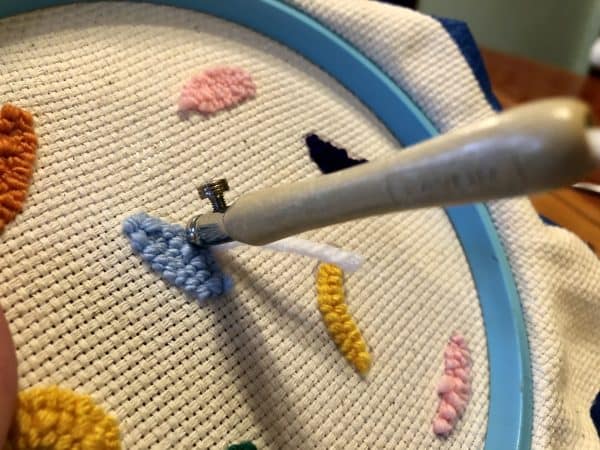
A way to help you not accidentally cross your loops together is to use one set of your fingers on the other side of your project, holding back the yarn loops you’re punching next to, and using your fingers as a guide for your needle of where to punch.
It may sound a bit complicated at first, but trust me, once you do it just a few times it will feel like second nature to you.
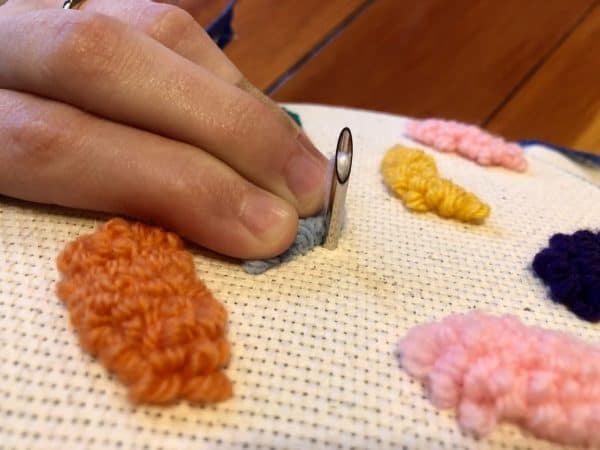
Just as you’ve done before with your smaller details, once you’ve finished an outline you can turn your project over and snip your yarn.
If you do see a few loops out of place, you can readjust them by moving them around with the tip of your punch needle. Almost like yarn surgery!
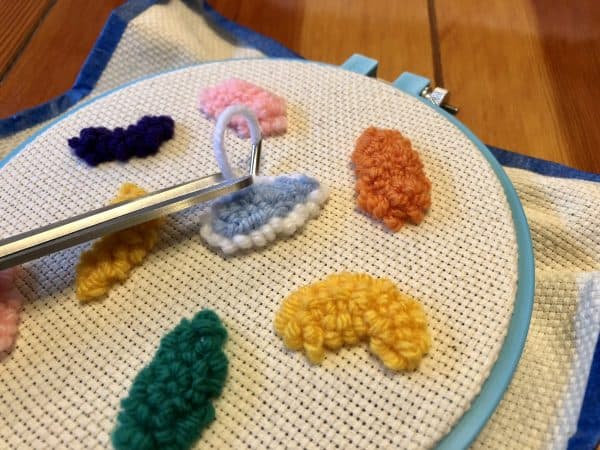
One down, and a few more outlines to go while we’re learning how to make a candle mat; not too shabby, huh?
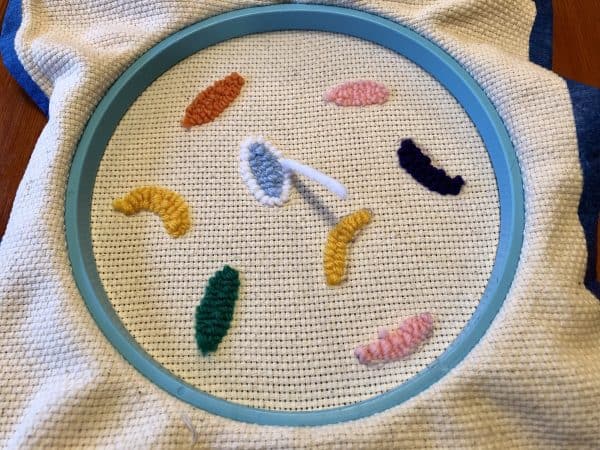
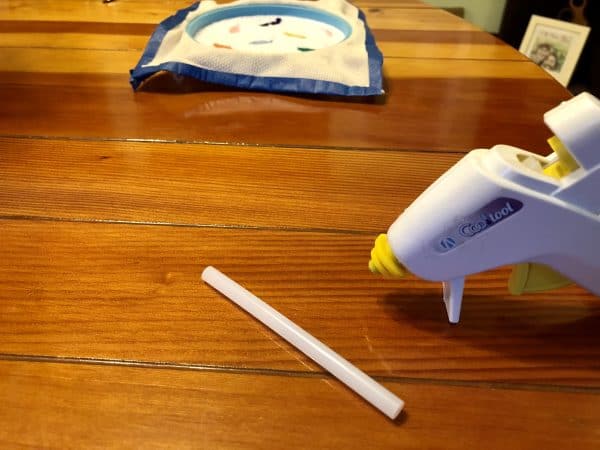
When you’re getting towards the middle of punching in the background of your punch needle project, take a moment to plug in your hot glue gun so that it’s ready to go for the next step. Wow, we’re almost there to finishing up how to make a candle mat! Time flies when you’re having crafty punchy fun!
Once your smaller details are outlined, it’s time to move onto the rest of your punch needle project.
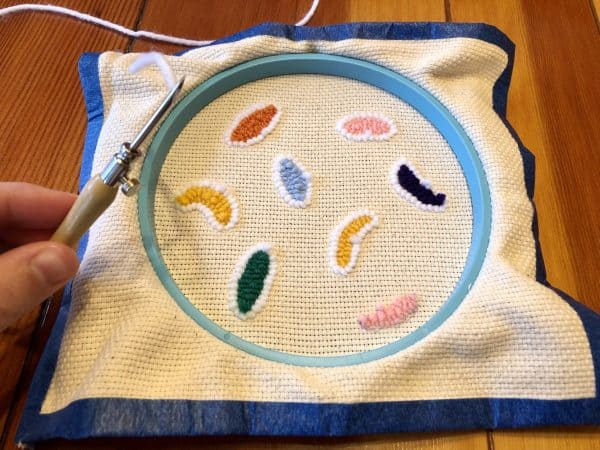
I like to start by punching the border of my punch needle project, it makes for a smooth sailing punch needle experience to have those guidelines!
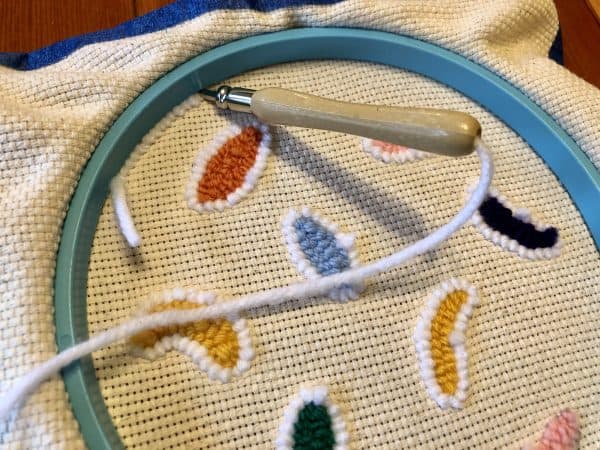
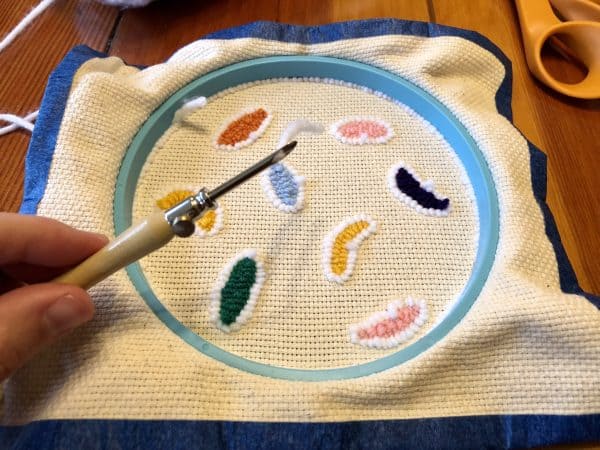
Then after your border is punched in, it’s all filling in from there! You can either take it section by section, like what I’ve done in the photo below, or do your own thing! It’s your punch needle project, and I have all the yarn and faith in you that you’ll do a mighty crafty job.
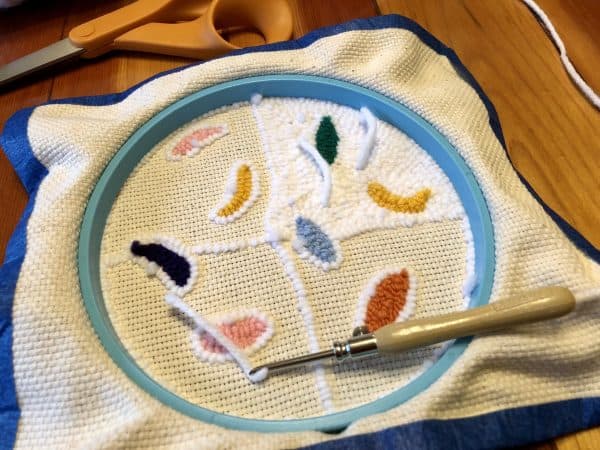
Would you just look at that, the details and background are in, this punch needle project mission how to make a candle mat is coming along beautifully. Only 2 step left!
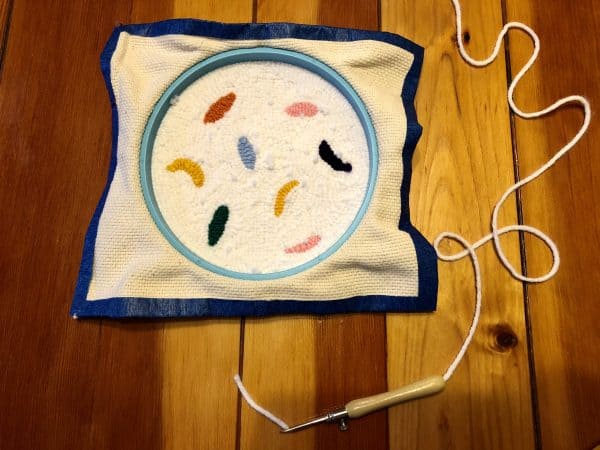
Step Four: Finish Punching & Take Off Hoop
You’re all finished with your fine punching skills, all the details are in, and now it’s time to take your punch needle project off the hoop.
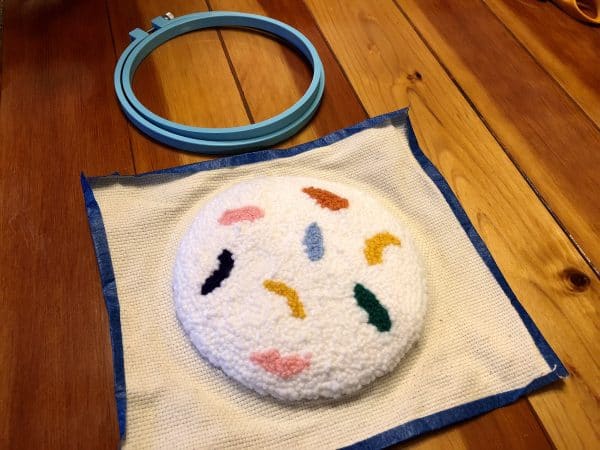
Either carefully peel or cut off the painter’s tape around your monk’s cloth, but keep those scissors handy.
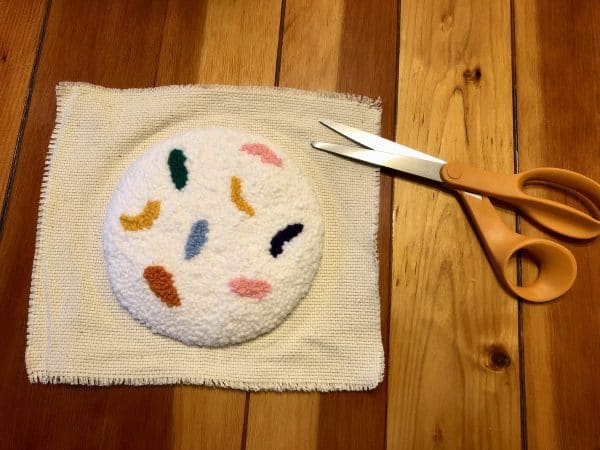
Cut the extra monks cloth around your punch needle project, leaving a few inches around it like in the photo below.
Don’t toss that extra monks cloth though, we’ll be using it in the next step!
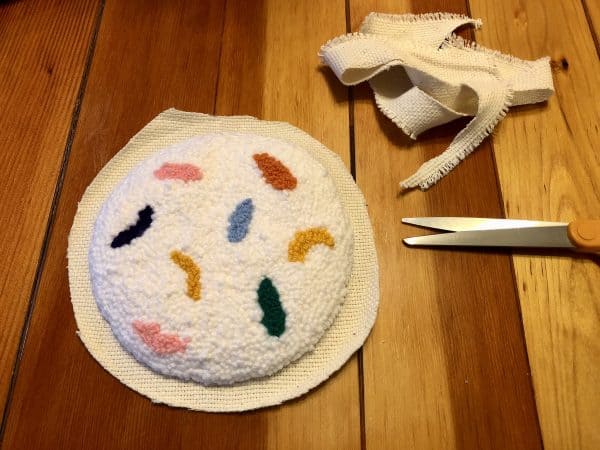
Still utilizing your scissors, with your looped side facing up, cut slits all around your punch needle project.
Creating the monks cloth tabs you see in the photo below, you can cut the slits all the way up to the yarn.
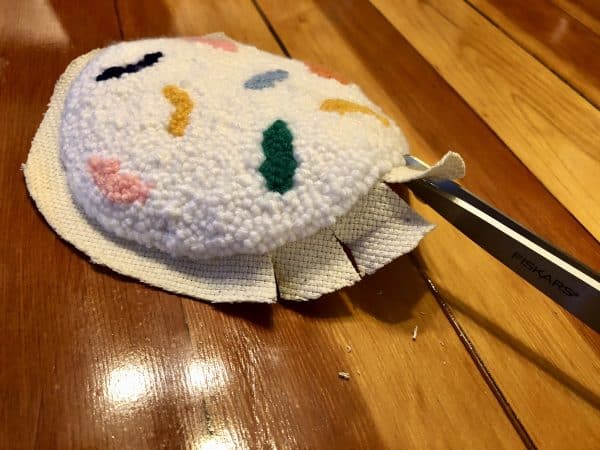
Step Five: Hot Glue Remaining Monks Cloth & Backing (Finish!)
We’re in the home stretch of learning how to make a candle mat with your handy-dandy punch needle! Whoop whoop!
After your hot glue gun is all heated up, it’s time to hot glue those monks cloth tabs down onto the flat stitch side of your punch needle project.
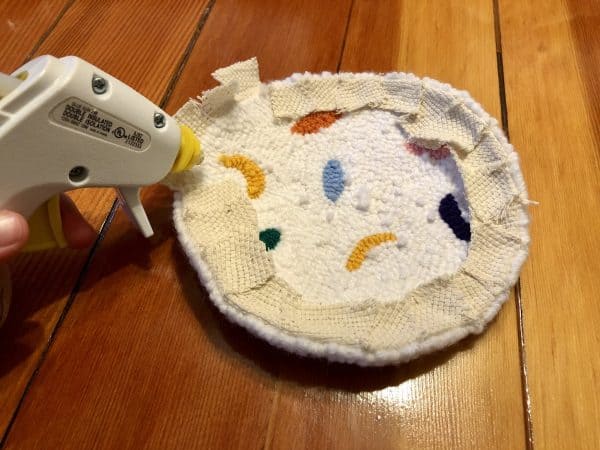
Once your monks cloth tabs are hot glued down on the flat stitch side of your punch needle project, get those monks cloth other fabric scraps of your choice.
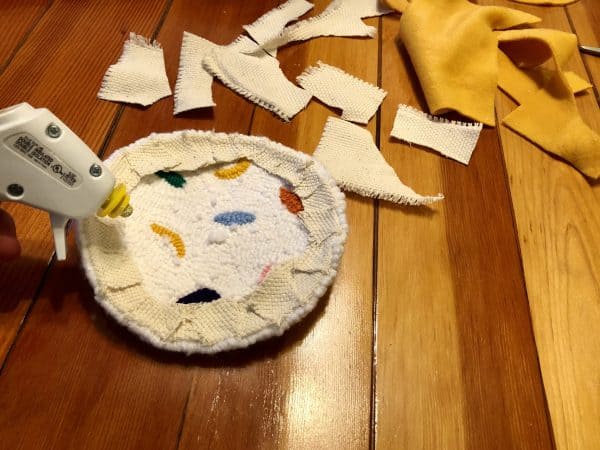
This part isn’t entirely necessary, but it does add a nice cushion to your cozy candle mat. It’s also an excellent way to repurpose materials so they don’t go to waste.
I’ve hot glued down the extra monks cloth from this punch needle project onto the flat stitch side, first. And then I added another layer of cushion by hot gluing extra fleece baking fabric that I had left over as well.
This part doesn’t have to be perfect looking or pretty because we’ll be covering it up, but I would try to make it even so that your punch needle project doesn’t look on the wonky side.
Unless that’s your aesthetic, then get it crafty gurl.
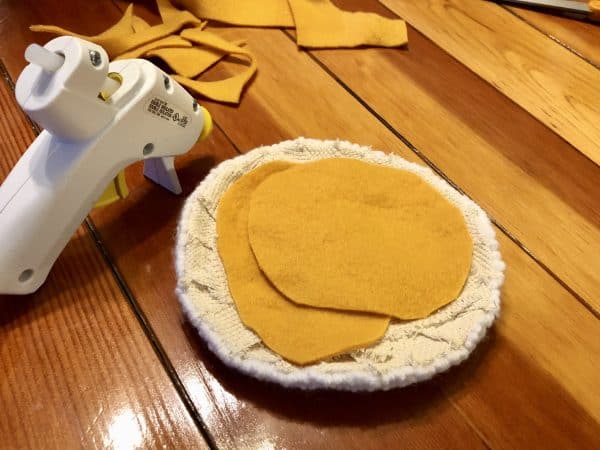
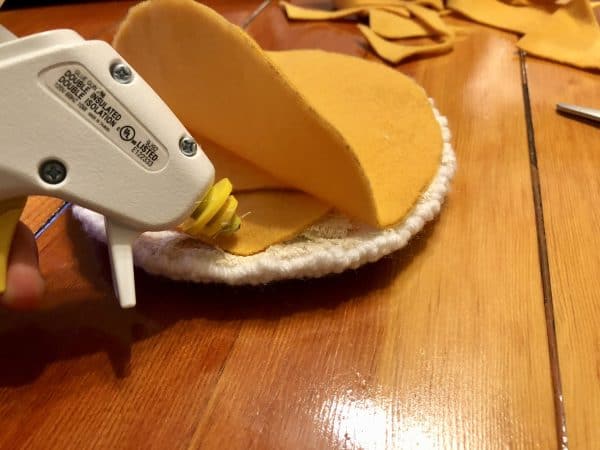
After your extra cushioning is glued on, it’s time to hot glue the fabric backing onto the back of your punch needle project.
I used the inside part of my chosen embroidery hoop to measure how big of a fleece piece I needed for my candle mat project!
Typically, I first do a line of hot glue down the middle and secure my backing onto my project that way. Then, I simply hot glue around like in the photo above.
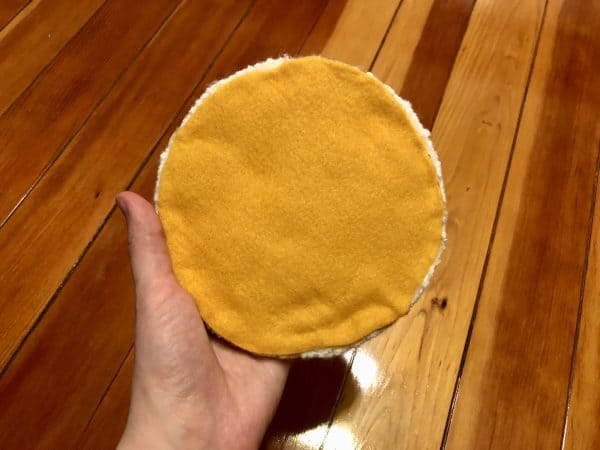
Give your hot glue a bit of time to dry before using your new candle mat or snipping off any overhanging backing.
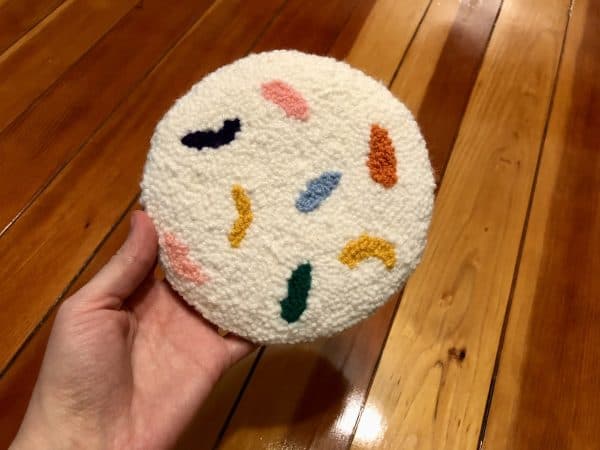
And just like that, you learned how to make a candle mat with your punch needle like a PRO! That’s another punch needle project in the crafting DIY books, and even more to come with all this punch needle experience you’ve got under your belt.
Take a peek at some of these other punch needle projects you could try your punchy hand at!
Don’t worry, we didn’t include every punch needle project we have; there’s plenty of surprises to be found on our Punch Needle page!
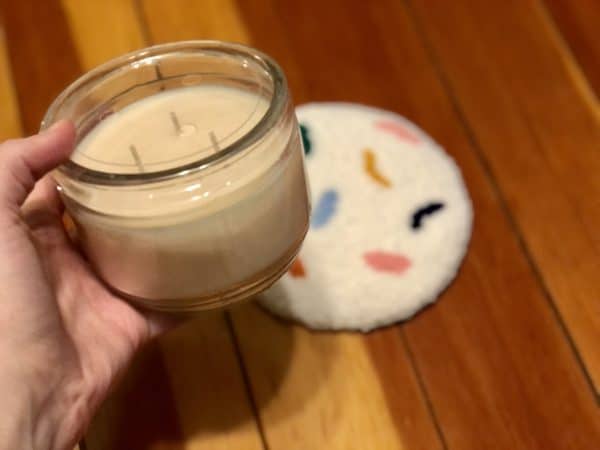
From all of us at Repurpose Junkie, I hope you had a swell and lovely time learning how to make a candle mat during this punch needle project.
Punch Needling is such a gratifying, creative, and even meditative hobby that I’m so pleased is becoming popular and loved. I highly encourage you to take a peek at our Punch Needle section, that’s FULL of free punch needle guides, tips, tricks, patterns, gift ideas, and MORE! We love providing these high-quality articles and guides because crafting should be for everyone. Let’s knock down those DIY barriers and all share and bask in the wonderful world of creativity!
I hope you’ve enjoyed learning how to make a candle mat and you’ve gotten even more ideas for future punch needle projects. Enjoy!
