This post may contain affiliate links. If you make a purchase through links on our site, we may earn a commission. And if you do that, you are AWESOME!!! Thanks :)
… …
I bought this solid wood entryway console table at a garage sale for $2 about a year ago. It certainly didn’t look like much at the time, but when I got done refinishing an entryway table for the first time I was really happy with the results…and the price! I refinished it by simply giving it a nice coat of paint and put it in the entryway to hold gloves, hats, keys, you name it. This little table because a great piece of home decor for a couple bucks and some elbow grease!
Why I Choose to Refurbish Old Furniture
Purchasing old furniture and refinishing it instead of buying new items has been such a rewarding DIY experience for me, and I think it could be for you too. Not only do I save money, but I also get the chance to create something truly unique that fits my personal style. I’ve found that older furniture is often built with better craftsmanship and more durability than the mass-produced pieces in stores today. By refinishing these finds, I’m not only preserving a piece of history but also giving it a second life in my home. Plus, when I score a great deal at a garage sale or flea market, it’s a win-win for my budget and my décor!
One of the things I love most about refinishing old furniture is the ability to customize each piece to fit perfectly into my home. I get to choose the colors, finishes, and little details that make the furniture feel like it was made just for me. There are some great resources that have helped me along the way. I really like the guide from Young House Love on painting and refinishing furniture. Also, Pretty Handy Girl has some awesome tutorials on repairing and refinishing old furniture. If you’re thinking about starting a refinishing project, these guides are full of useful tips!
The Entryway Table Refinishing Project
Over the years the table took quite a beating from daily use right in the front entry of the house, so I decided it was time for the table to get a makeover. I wanted to paint it orange and use it in our living room for a side table. Here’s a photo of the end result from refinishing an entryway table. Unfortunately I was so excited to start the project I didn’t take great photos for a step-by-step tutorial.

I sanded it down to nearly the bare wood with fine grit sandpaper and an orbital sander for the flat surfaces on the body of the table. Then I got the dust off with a tack cloth and set about to priming as my next surf prep step. I primed the whole table with an inexpensive primer coat, then I painted it with a foam roller for the top coat, second coat, and third coats on the tops and used a small paintbrush for the spindle legs. I wasn’t worried about the grain of the wood on this old table, even though it was rather pretty, since I knew I’d be painting the entire thing.

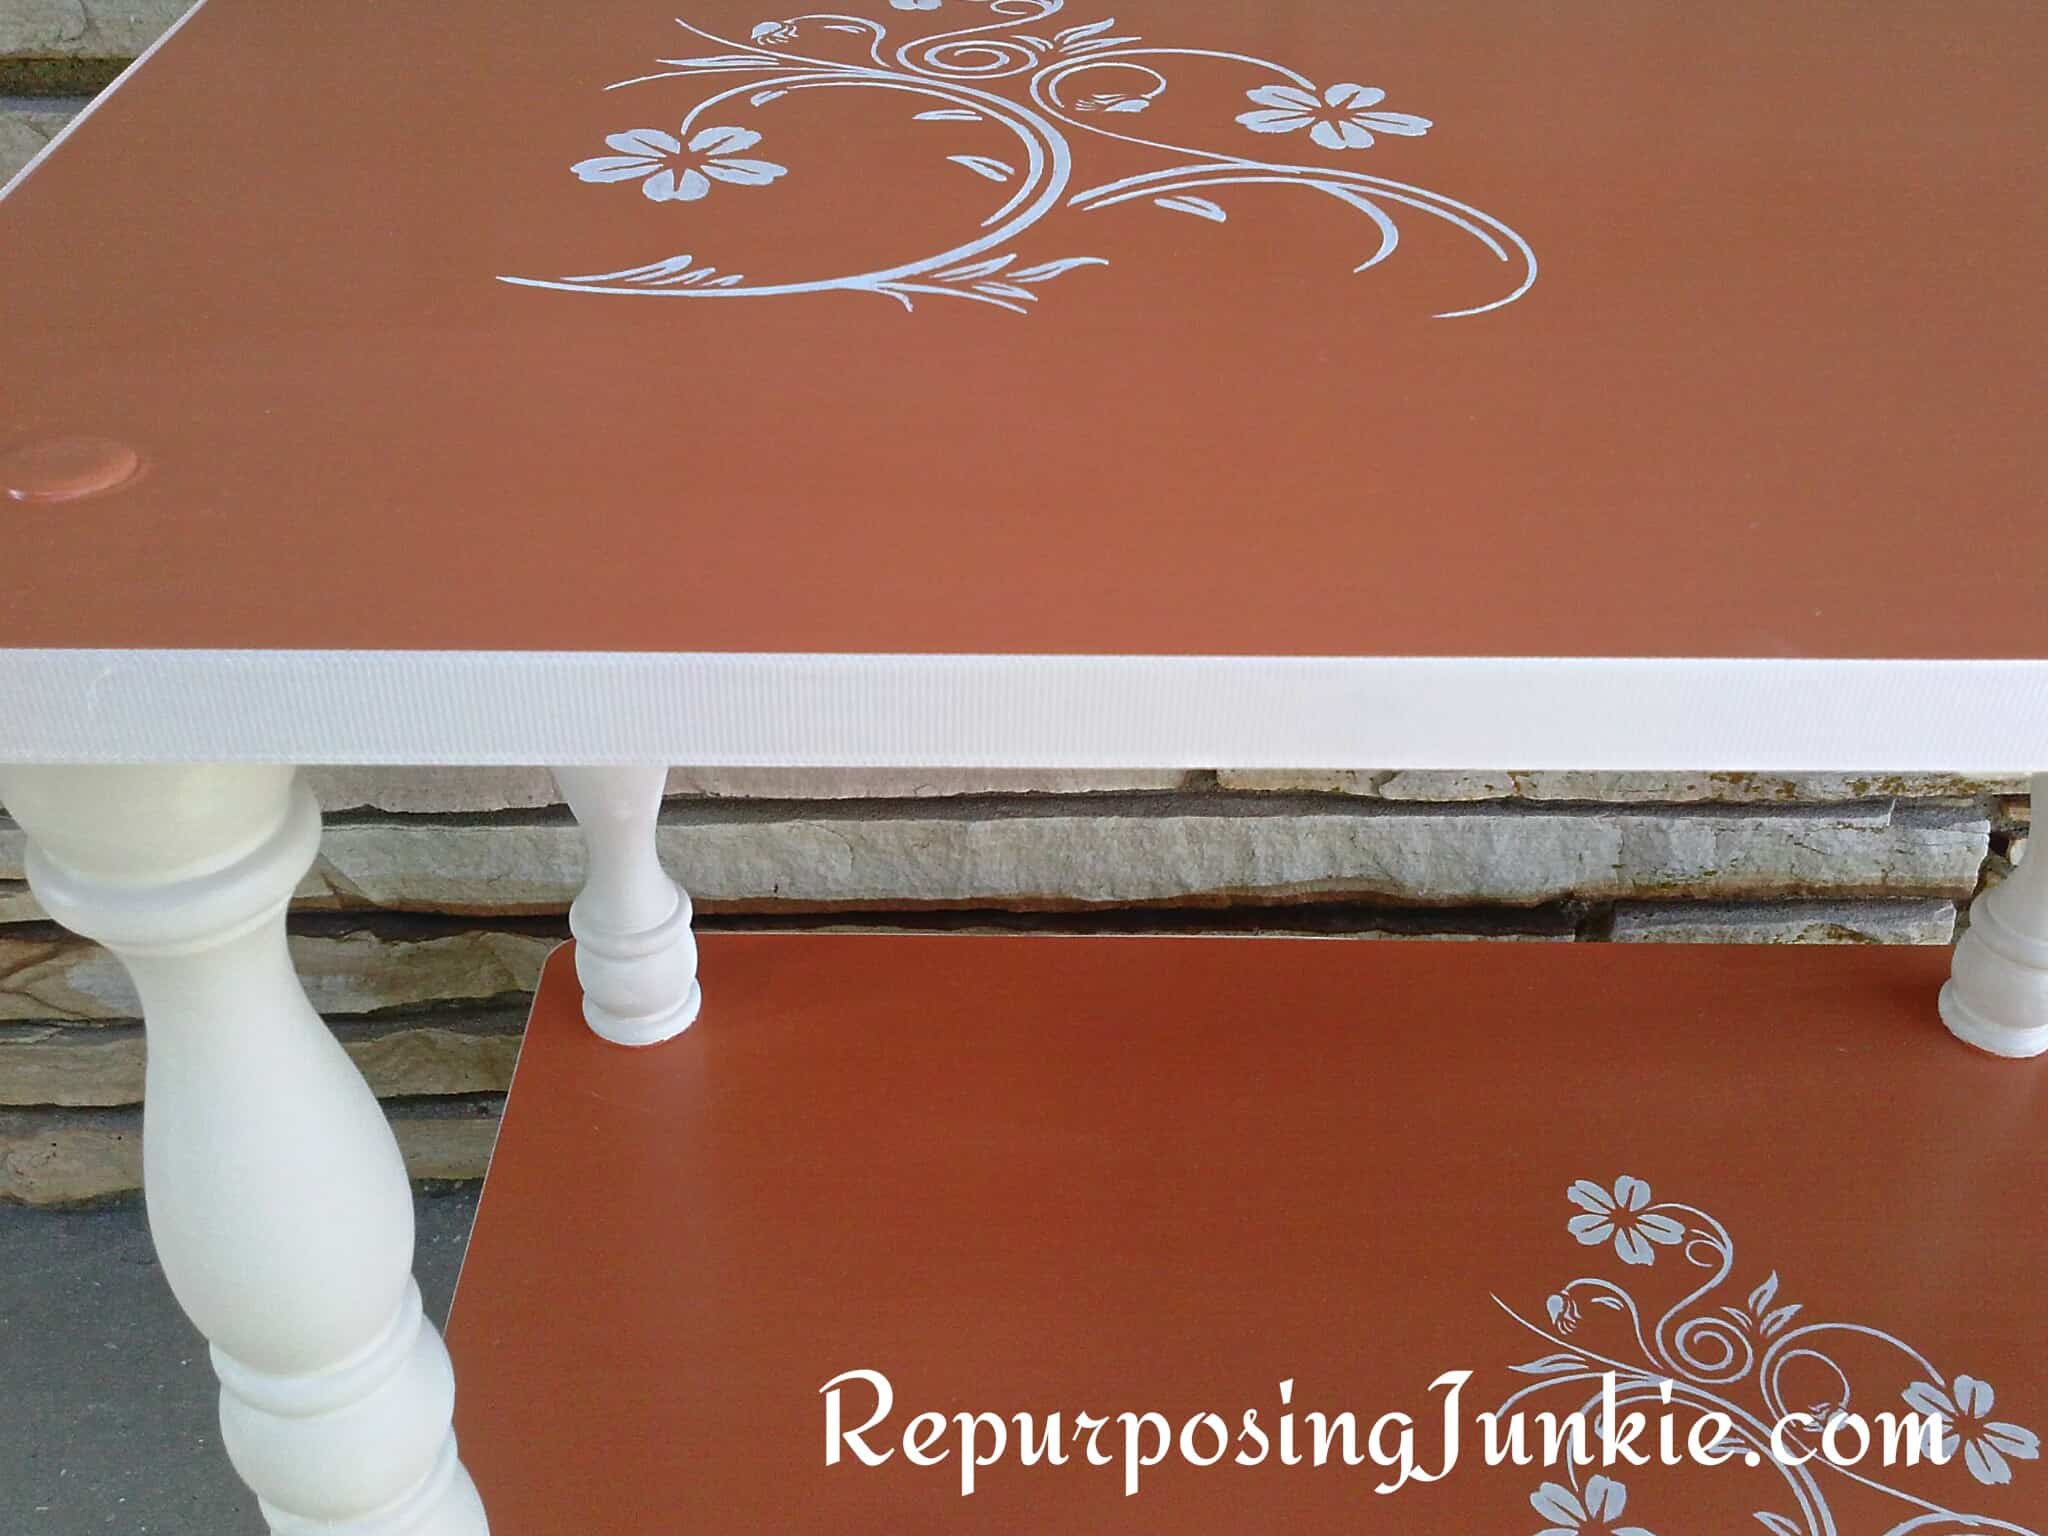
I also put a stenciled design on the top level as I was refinishing an entryway table. This table was always pretty functional in the house, since overflow items could be stuck on the bottom level and the daily use items tossed up on the top level.
I got this beautiful stencil from one of my favorite craft stores, Hobby Lobby. It’s from the Show Offs stencil brand. Here is the link to the stencil. At first I was thinking it looks so nice I might have to be a bit more careful with what gets placed on the table — keys and other hard objects might scratch it — but then I realized in a few years I might just want to refinish it again!

I decided I liked the stencil on the top level so much that I would stencil on the bottom of the table as well. I offset the two stencil designs to make the look a bit more asymmetrical. The flowing design of the Show Offs stencil I got at Hobby Lobby really lent itself well to that offset look.

Not too shabby. I enjoyed using the two different colors, and I love how adding just a little bit of embellishment with the Show Offs stencil from Hobby Lobby really makes this piece of furniture stand out even more.
If you’re looking for something different than what you typically find at Hobby Lobby, we also wrote this article about alternatives to Hobby Lobby stencils that you might want to check out. Sometimes it’s nice to step out of the box & venture out of your comfort craft store!

I also hot glued ribbon on the edge of the table where there used to be veneer. If you haven’t used hot glue and ribbon on wood before, there’s really not much to it. Just be careful not to use too much glue or you’ll get ripples and bubbles from the glue itself under the ribbon. In this case, less is more in terms of glue volume…as long as you get a good thin band of glue all around the top and bottom of the table’s edge.
You’ll also want to go slow and press the ribbon down as you go — just remember the glue is HOT when it is first applied so you might want to use some silicone thimbles, they really help protect against the heat.
No products found.
The veneer was coming off when I bought it and so I put ribbon on the edge when I refinished it both times. The nice thing about using ribbon is the cost and low effort for sure. You’d be surprised how good it looks around the edges of the table. The pictures definitely don’t do it justice!
The final result of Refinishing and Entryway Table
I like the new look. How about you? It’s a far cry from the original old brown look, and has become a real conversation piece in the entryway of our home.

What types of furniture have you refinished & repurposed? Where do you find your repurposing treasures? Rummage sales, Facebook Marketplace, Craigslist (does anyone use that one anymore)? I’m always looking for good ideas and love hearing about your flea market & rummage sale discoveries. Let me know in the comments!
