In This Article
This post may contain affiliate links. If you make a purchase through links on our site, we may earn a commission. And if you do that, you are AWESOME!!! Thanks :)
An electric guitar was given to us by someone who was cleaning out their attic. I wanted to repurpose the guitar and after much contemplation decided to turn it into a guitar coat rack. Join me here on our journey into the wonderful world of rack & roll (sorry, I couldn’t resist the pun).

Prepping the Guitar Coat Rack
I cleaned the guitar up a bit.
It took me a little while because I ended up having to take some of the guitar apart in order to clean it better.
When I was putting it back together I had mixed feelings about taking it apart in the first place.
It was much cleaner but it was a pain re-attaching all the pieces.
One thing I didn’t re-attach was the strings.

Adding the Garment Hooks to for a Proper Guitar Coat Rack
I took a trip to Lowe’s and got some silver garment hooks that would match the silver on the guitar.

- USE ANYWHERE: Maximize organization in small spaces with wall-mounted coat hooks
- DIMENSIONS: Coat hook measures 1.79-in H x 0.75-in L x 1.48-in D
- FINISH: Light nickel with smooth matte finish coordinates with any room's decor
- BUILT TO LAST: Durable metal coat hooks withstand the daily grind
- COORDINATE: This casual design creates a laid-back charm to your room
I then placed the hooks on the guitar where I wanted them and marked the screw holes with a sharpie.
I ended placing 6 hooks about 5 inches apart.


I also pre-drilled the holes to help prevent damage to the guitar’s finish when inserting the screws for the silver garment hooks .
This was the most important step especially when drilling into the neck of the guitar.
It was much more difficult fastening the hooks onto the neck of the guitar than the body, since the wood on the neck portion was a much harder wood.

The hooks were attached using a screwdriver by hand. An electric drill here could potentially have damaged the guitar wood if it went in too fast.


Add the Picture Hanger D-Rings to the Guitar Coat Rack
Once all 6 hooks were attached there was nothing left to do but figure out how to hang the guitar on the wall.
Due to the body and neck not lying flat on a given surface I had a dilemma.
I bought these picture D-hangers in two different sizes that I hoped would do the trick.

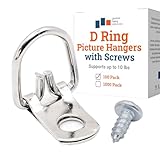
- Reliable Support: Pro quality D ring picture hangers with screws provide a secure and stable way to display your artwork. Frame back hanger, perfect for wood frames
- Easy Installation: Picture frame hangers for back of frames simplify the hanging process; includes d-ring and screws for a hassle-free setup that saves you time and effort
- Versatile Options: D hooks for picture hanging offer flexibility in display arrangements; ideal for various frame sizes and styles, allowing you to customize your decor effortlessly
- Durable Construction: Our D-Rings have the most inside wire or ring wrapped around the strap which makes this heavy duty picture hanger stronger than others
- Technicals: 1 1/4" Long x 5/8" Wide D-Ring Picture Hanger. Bulk pack includes 100 hangers. Framing supplies kit includes 100 #6 x 1/2" Combo Top Slotted/Phillips Screws
Two small hangers were fastened to the back of the body and the big hanger was attached to the back of the headstock. Make sure when you’re drilling on the back of the headstock that you don’t drill all the way through, because you don’t want to see the hole through the front of your guitar coat rack — it should look like it’s still playable for the maximum visual effect!


With the two different sized hangers the distance from the guitar to the wall was balanced and would now hang on the wall without problems.
I also thought it would be neat to use a guitar strap to hang it, or fastening hooks into the wall and placing the guitar on them.
I tried the guitar strap hanger.
The Final Guitar Reused as Guitar Coat Rack
Here are pictures of the results of using the D-hangers and the guitar strap. I really like the addition of the strap to add some liveliness to the overall display and make it look like a true rockin’ guitar. What do you think?


Have you ever repurposed a musical instrument into home decor? Let me know in the comments. I’d love to see your creations! And if you’re looking for an inexpensive used instrument I’ve always had luck finding them on Craigslist or Offerup. And the great thing is, the instruments don’t have to be functional just like this one I used for the guitar coat rack. They just have to look cool!
